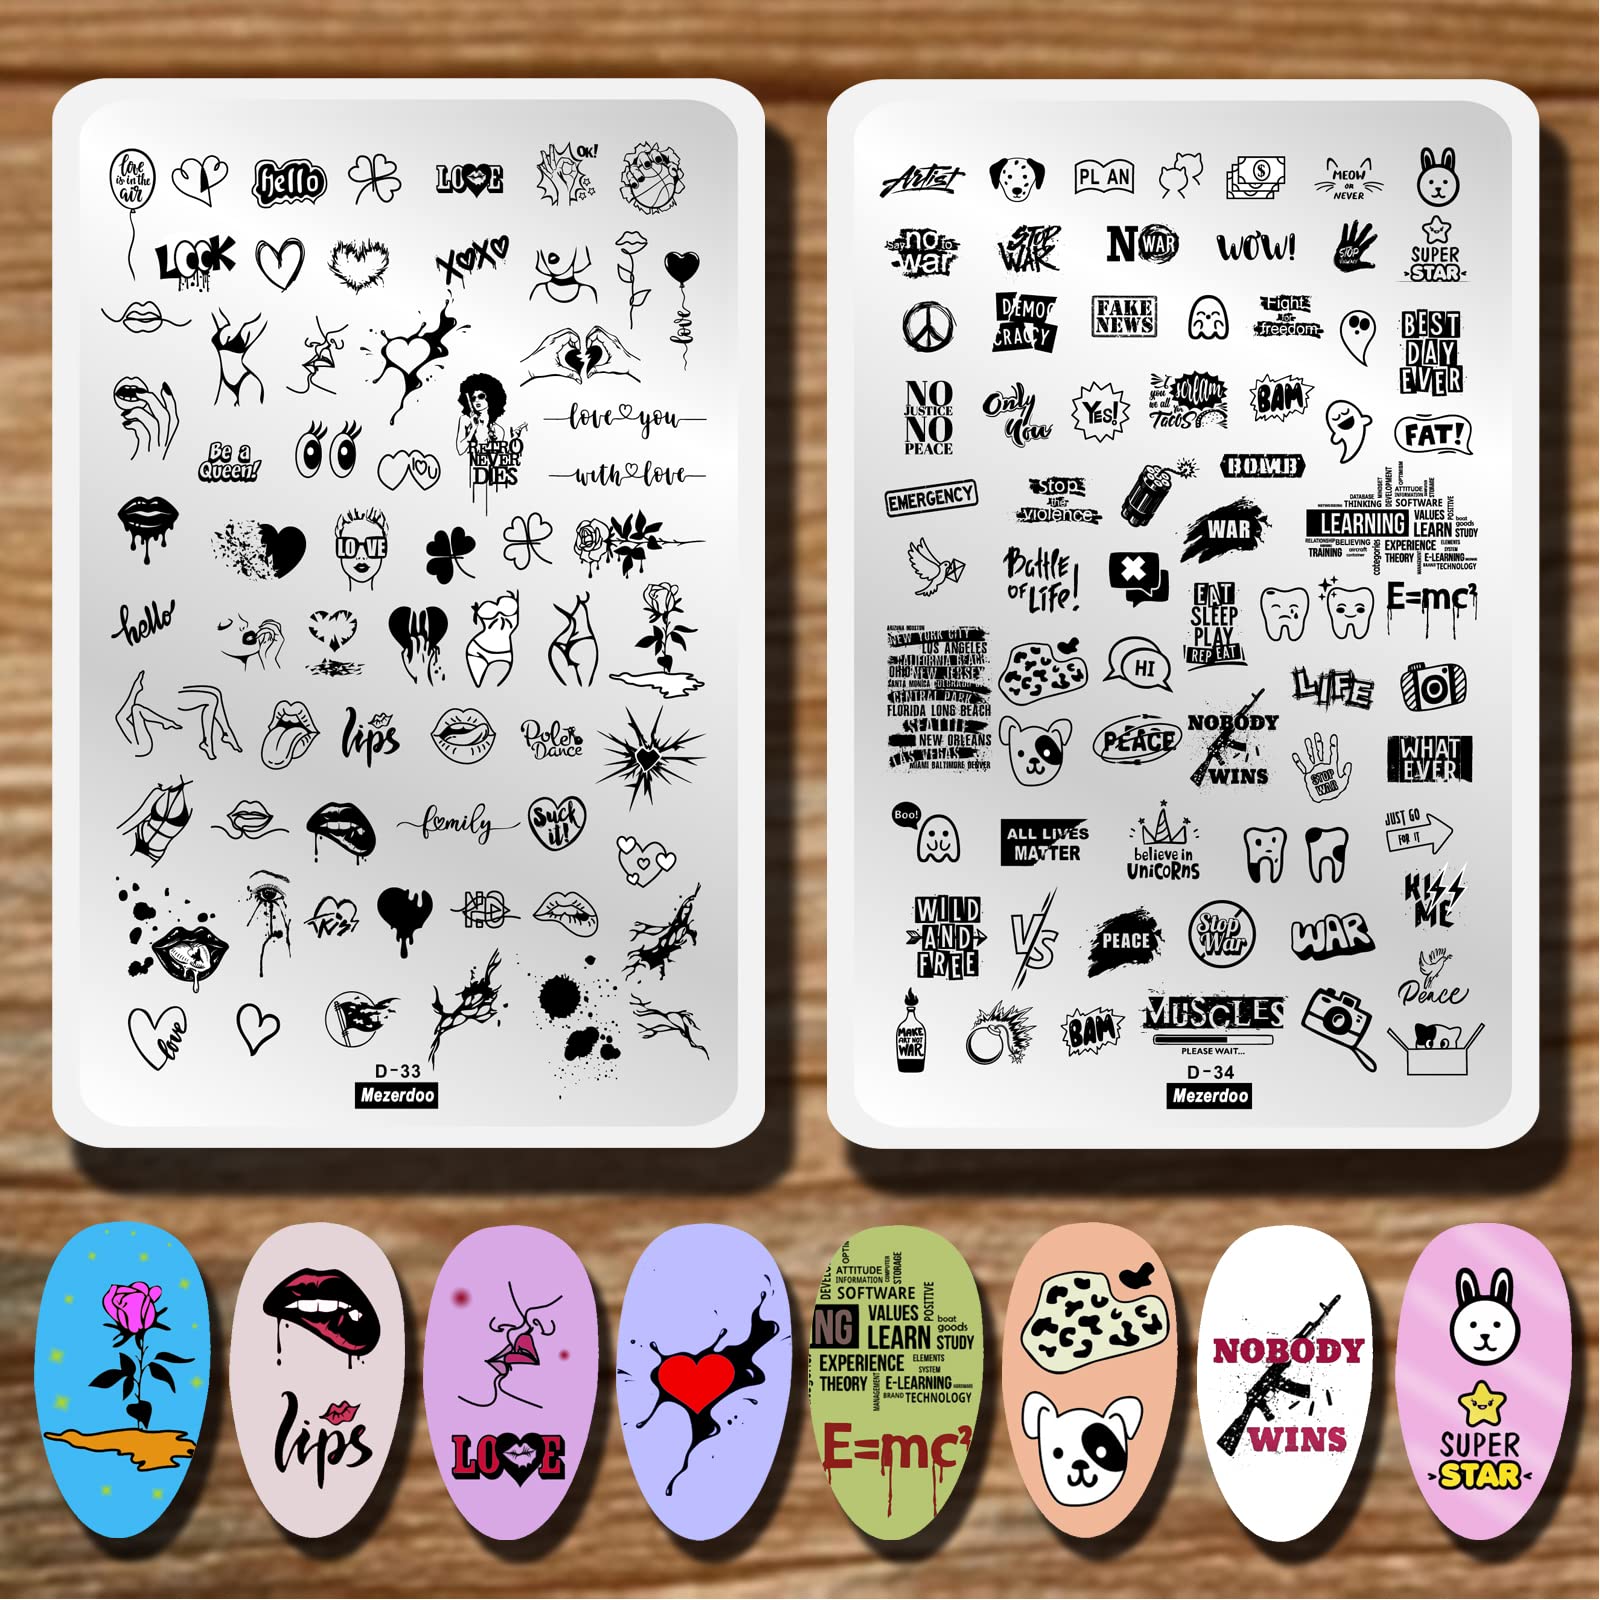
PACKAGE CONTENTS: 2 Pcs Large Nail Art Stamp Plate, Lips, Line, Flower, Leaf, Eyes, Love Heart, Sexy Girls, Letter, Word, Fire, Point, Star, Animal, Dog, Cat, Teeth, Ghost, Abstract Face, Geometric Patterns, Notice: The Stamp And Scraper Are Not Included EASY TO USE: Apply Any Color Stamping Polish To Your Chosen Image On The Stainless Steel Nail Stamping Plate. Using A Scraper, Remove Any Excess Stamping Polish. Using A Stamper, Stamp The Image In A Rolling Motion. Stamp The Design Directly To The Nail HIGH QUALITY: The Plate Is Made From High-Quality Stainless Steel, Sturdy, Durable, No Bend, Reusable. Deep And Precise Carving Gives You A Better Stamping Effect. You Can Get Image Easily. Have White Pads Well Protected From Scratches And Damaged IDEAL GIFT: The Nail Stamping Plates Kits Are Appropriate For Any Holiday Or Special Event, Such As Birthday, Holiday, Anniversary, Christmas, Valentine'S Day, Halloween Gift. Gifts For Nail Professionals And Diy Nail Art Lovers WARM NOTE: 1) Before Use, Peel Off The Tight, Protective, Blue Plastic Film On Top Of Each Plate. 2) Please Use Professional Stamping Polish And Try More Time. 3) Must Use Stamper And Scraper To Stamp Images From The Nail Plates Properly PRODUCT DESCRIPTION:
Type: Nail Stamping Plates
Quantity: 2 Pcs Big Size
Size: Approx. 14.5cm*9.5cm(5.71inch*3.74inch)
Material: Stainless Steel
High Quality Nail Stamping Accessories
The Nail Art Stamping Plates Pattern: Lips, Line, Flower, Leaf, Eyes, Love Heart, Sexy Girls, Letter, Word, Fire, Point, Star , Animal, Dog, Cat, Rabbit, Birds, Teeth, Ghost, Abstract Face ,Geometric Pattern Design , more details are shown as pictures
PACKAGE CONTENTS:
2pcs Large Nail Stamping Plates
HOW TO USE:
1. Apply base gel or regular polish on the nail.
2. Apply the stamping polish to desired image within a plate.
3. Make a scraper leaned over 45 degrees and scrape excessive polish off quickly and strongly from inside to outside.
4. Immediately press the stamper with a gentle rolling motion to pick up the design. The image is transferred on the stamp.
5. Stamp the image on your nail with a gentle rolling motion. The image is transferred on your nail.
6. Repeat the same steps for all of your nails.
7. After the design is finished, apply top coat for lasting wear.
TIPS FOR STAMPING
1)Prepare transparent adhesive tape, it is easy to clean the stamper with the tape.
(The choice of nail polish,it depends on the viscosity and concentration of the polish,we’d better chose the stamping polish to operate it.)
2)Smoothing the scraper
-The new scraper maybe not so smooth, we can smooth some time before using;
-We should try different angle and different strength to scrape to get a perfect stamping effect.
3)Stamp along the arc of the stamper, press on one direction only one time.
Try more times with different degree and different polish ,you will get a easy nail art !
For beginner, we suggest stamping polish, which is professional for stamping !
NOTE: A Nail stamping polish gel is required to provide the best experience.