CNC machined from Acetal Plastic for strength and durability Frame Slider Kit requiring fairing modifications on both sides Designed to protect motorcycle frame and engine components Comes with two 10mm x 90mm steel bolts needed for installation Manufactured in The USA This Pro-tek frame slider kit is made from acetal plastic for strength and durability. It requires modifications to both fairings.
It comes with all steel bolts, mounting hardware and complete instructions needed for installation.
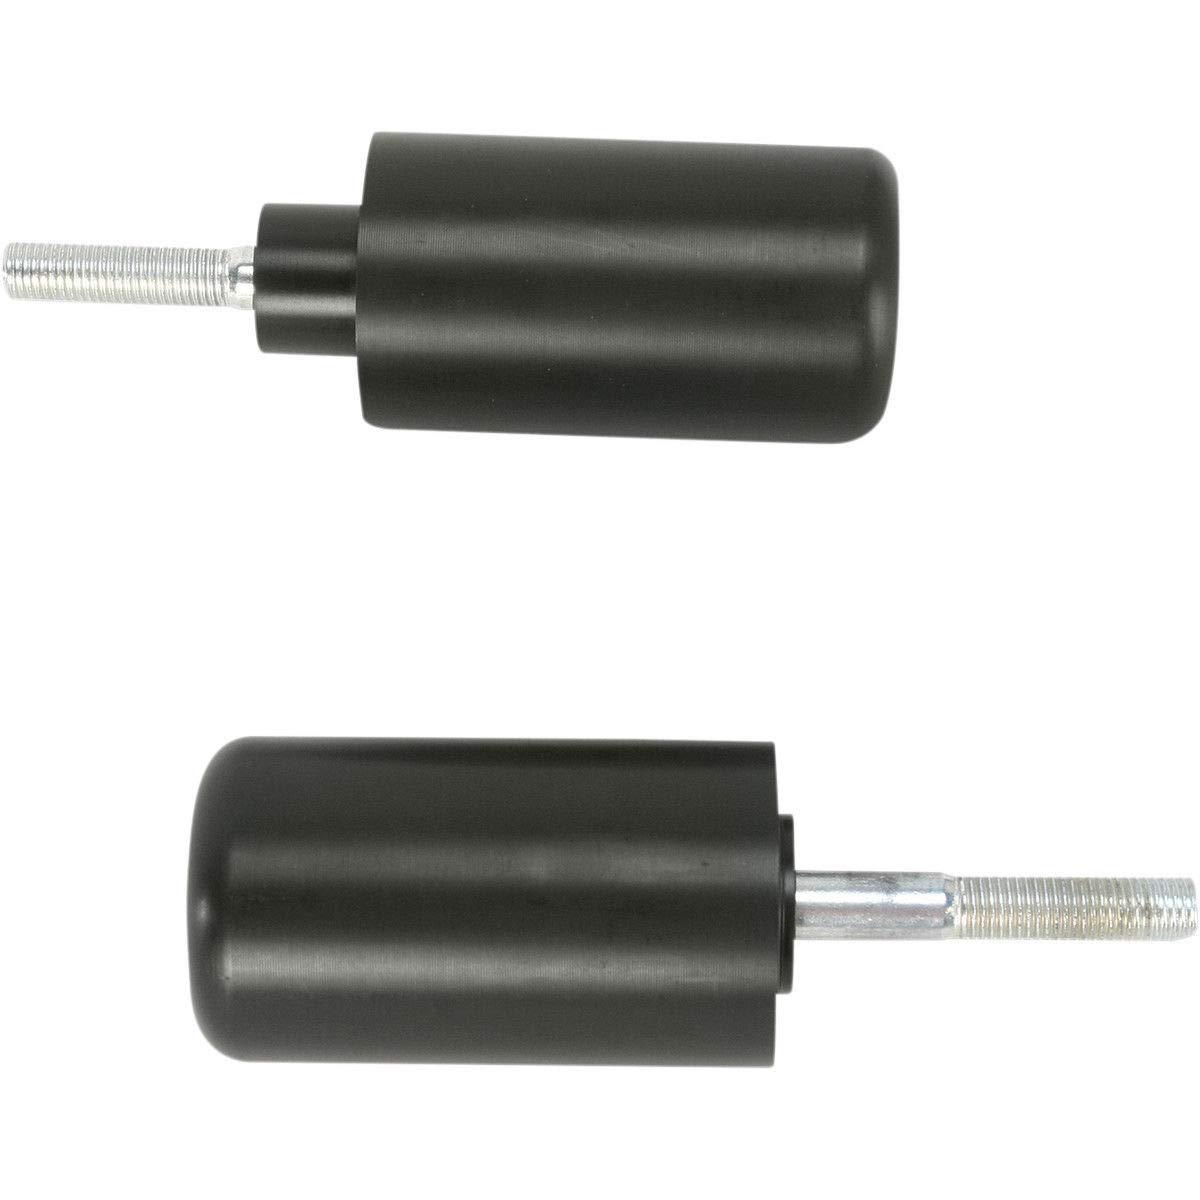
The kit contains two acetal pucks with aluminum shims with steel bolts that clear the fairings by an inch.
You do not want a slider to stick out too far causing a bike to flip in a crash by snagging on the ground. You want the puck to either touch down and start to grind off or if hit hard enough or direct enough to shatter and absorb the initial crash energy. If the slider shatters, grinds off or bends, it did it's job in absorbing the crash energy. You don't want it transferring the energy to other parts of the bike causing more costly damage.
Left puck measures 95mm (3.75") in length. Right puck measures 82mm (3.25") in length.
These frame sliders are brand new in original packaging manufactured in the US from Pro-tek, a leading manufacturer in the motorcycle industry now for 25 years.
Applications
2008-2024 Suzuki GSX-1300R Hayabusa
The frame sliders are mounted to the upper engine mounts. The fairings require modification during installation. This is best done by first removing the fairing. Locate the engine mount bolt & replace with the supplied bolt. If heat shield foam is not present, apply playdough to inside fairing where cutting will take place. Put the fairing back and see where the bolt head has left an impression in playdough/heat foam. This is the center of the hole to be drilled. Mask outside of fairing with tape to prevent chipping during drilling. Take 2" hole saw and center around bolt head impression in playdough. Drill through fairing. Lightly file down rough edges around hole. Install protector and replace the fairings. Both sides require modifications.
It comes with all steel bolts, mounting hardware and complete instructions needed for installation.
The kit contains two acetal pucks with aluminum shims with steel bolts that clear the fairings by an inch.
You do not want a slider to stick out too far causing a bike to flip in a crash by snagging on the ground. You want the puck to either touch down and start to grind off or if hit hard enough or direct enough to shatter and absorb the initial crash energy. If the slider shatters, grinds off or bends, it did it's job in absorbing the crash energy. You don't want it transferring the energy to other parts of the bike causing more costly damage.
Left puck measures 95mm (3.75") in length. Right puck measures 82mm (3.25") in length.
These frame sliders are brand new in original packaging manufactured in the US from Pro-tek, a leading manufacturer in the motorcycle industry now for 25 years.
Applications
2008-2024 Suzuki GSX-1300R Hayabusa
The frame sliders are mounted to the upper engine mounts. The fairings require modification during installation. This is best done by first removing the fairing. Locate the engine mount bolt & replace with the supplied bolt. If heat shield foam is not present, apply playdough to inside fairing where cutting will take place. Put the fairing back and see where the bolt head has left an impression in playdough/heat foam. This is the center of the hole to be drilled. Mask outside of fairing with tape to prevent chipping during drilling. Take 2" hole saw and center around bolt head impression in playdough. Drill through fairing. Lightly file down rough edges around hole. Install protector and replace the fairings. Both sides require modifications.